

×

Technical requirements

This guide will help you choose the right version for your vehicle and understand the technical requirements you should always check before placing an order.

At Simple Vans, we design furniture kits and conversions for bare-metal panel vans. Our pre-cut kits are developed for specific vehicle models and to defined technical specifications.

Before ordering, please read this guide carefully to check that your vehicle meets our technical requirements and that your conversion can be installed correctly.

Section 1

Choosing your version

Bare panel van with no fit-out: bare metal floor and wheel arches

Is your vehicle a bare panel van?

If your model and its version match one of the pre-cut models available on our website, you can go straight to the next step.

If in doubt, use our van selector to check your vehicle’s version.

Then go to Section 3 – Technical specifications and installation precautions to make sure nothing in your setup rules out this version, and that you meet all the requirements for installing the furniture you have chosen.
Check my version

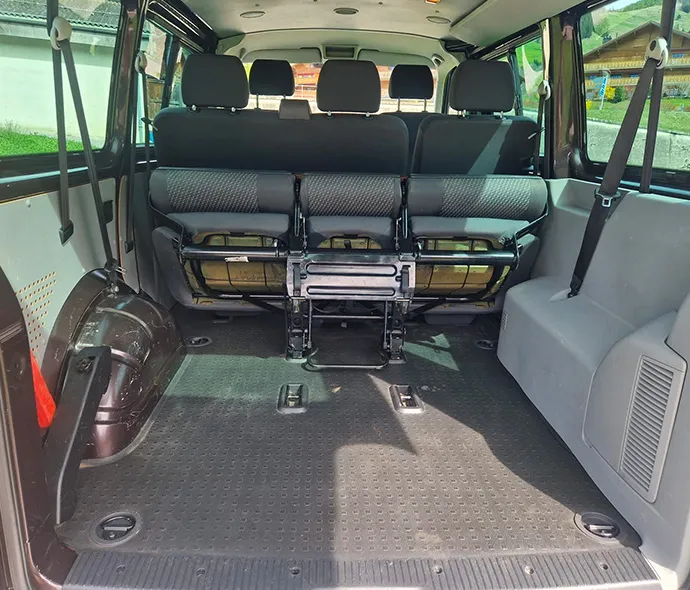
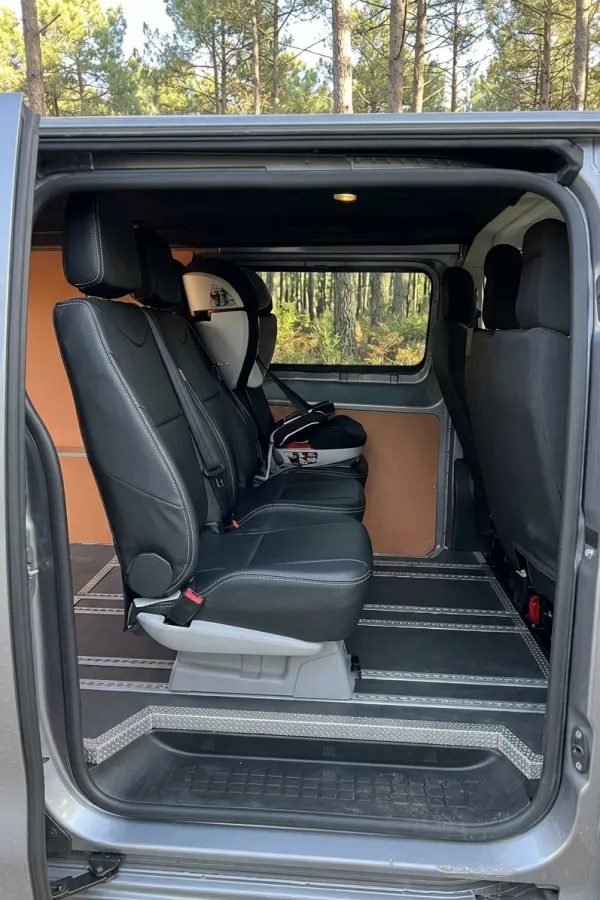
Vehicle with rear bench seats and floor rails
Crew cab with a rear bench and floor rails

Do you have a passenger vehicle or a crew-cab van?

Our furniture may still be installed using our ADAPTABLE range, subject to certain conditions.

Please read the next section carefully to see which modifications you will need to make to your vehicle before moving on to the technical specifications.

See the ADAPTABLE range

Section 2

The ADAPTABLE range

The ADAPTABLE range lets you use our furniture in setups for which we do not offer pre-cut kits, or which differ from our technical recommendations.

“ADAPTABLE” does not mean every vehicle is compatible. It means the furniture can be adjusted under certain conditions, provided you have enough floor space and meet all the technical requirements set out in this guide.

It covers three situations:

Vehicles for which we do not offer pre-cut kits

Older models, very recent models, or models simply not in our catalogue (use our van selector to check whether your vehicle falls into this range).

Read more

Vehicles with a specific interior layout

Rear seats or a crew cab.

Read more

Vehicles whose fit-out does not follow our technical recommendations

Raised floor, thicker insulation, tongue-and-groove panelling, battens, etc.

Read more

Important: Whatever your situation, you must check the usable dimensions of your vehicle before ordering. Make sure the furniture you select has enough space to be positioned and installed correctly.

No cutting templates are supplied with this range. Taking measurements, making adaptations and carrying out any cuts are entirely your responsibility.

Situation 1

We don’t offer a pre-cut kit for your vehicle

An older model? A very recent one? Or simply a model we don’t cover yet? T4, Expert 2, T7, Ford Transit Custom and many more: you’re in the right place!

We’d love to offer a pre-cut kit for every model, but our catalogue doesn’t cover every vehicle yet. The solution: choose your furniture from our ADAPTABLE range.

Every vehicle has its own dimensions and quirks, so your first step should be to measure the available floor space precisely. These measurements will let you choose furniture that fits your vehicle and confirm that it can be positioned as planned. Once you’ve chosen and ordered, you’ll receive straight-edged furniture, designed for you to trim to the interior shape of your van.

Don’t forget to check the technical requirements that apply to all vehicles (Section 3 – Technical specifications and installation precautions).

Situation 2

Your vehicle has rear seats or a crew cab

Vehicles with rear bench seats and/or a crew cab come with specific constraints. A conversion is required beforehand for a correct installation:

  • Remove the rear bench seats
  • Remove any plastic trim on either side of the vehicle that could get in the way
  • Install a wooden floor
  • Check that the height of the existing windows doesn’t prevent a unit from being positioned
  • Check that any floor rails don’t interfere with the furniture’s support points

Which furniture can you install?

  • Compatible: Bed only: usually straightforward, even without adaptations, provided there is enough floor space and it can be secured.
  • Compatible: K1 front kitchen unit: always supplied in the ADAPTABLE version; it needs no cuts to match the vehicle’s shape and is generally compatible.
  • Not compatible: A1, A2 and A3 side units and K5 rear unit: adapting them to these setups requires complex cuts that could weaken their structure. They are therefore not compatible as supplied.

Once the conversion is done, always re-check all your floor measurements so you choose furniture that suits your dimensions and constraints.

Then don’t forget to check the technical requirements that apply to all vehicles (Section 3 – Technical specifications and installation precautions).

Situation 3

Your fit-out doesn’t follow our technical recommendations

Has your interior fit-out departed from our recommendations? For example:

  • A floor raised more than 25 mm above the original floor ribs
  • Thicker insulation than recommended
  • Tongue-and-groove panelling
  • Battens or other elements that change the vehicle’s interior shape and dimensions
  • Other modifications

Even if we offer a pre-cut kit for your van model, these modifications can shift the cut lines relative to the actual body shape and prevent a correct installation. In that case, your vehicle also falls under the ADAPTABLE range.

You will receive straight-edged furniture, designed for you to trim to the interior shape of your van (or to leave straight if you have tongue-and-groove panelling).

Important: Different insulation or wall-lining choices can reduce the vehicle’s total usable width and therefore change the bed’s opening width. Check this carefully before ordering a mattress!

Section 3

Technical specifications and installation precautions

Van lined with plywood, felt on the pillars and wheel arches

Walls and lining

Our furniture is designed to fit the shape of standard interior linings: 5 mm plywood with 19 mm of insulation in the body recesses.

You can also apply carpet felt to all exposed bodywork surfaces.

Important: If you choose a lining of a different thickness and/or a tongue-and-groove finish, you will need our ADAPTABLE range (see Section 2).

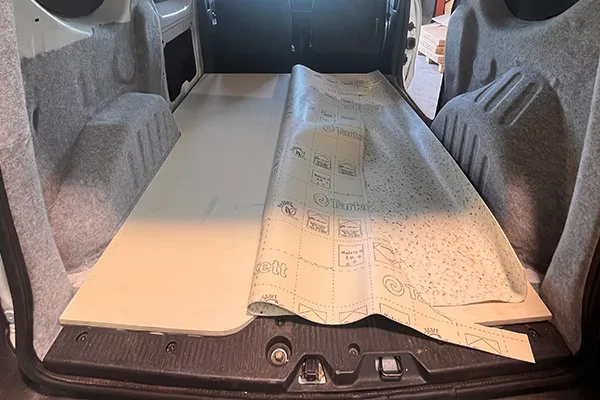
Floor

Our furniture is designed for a total floor thickness (including floor covering) of 10 to 25 mm. You can add insulation, provided the total thickness does not exceed 25 mm.

A wooden floor is mandatory to ensure our furniture is fixed securely.

Important: If you raise your floor beyond 25 mm, you will need our ADAPTABLE range (see Section 2).

Fitting a wooden floor and its covering in a small van
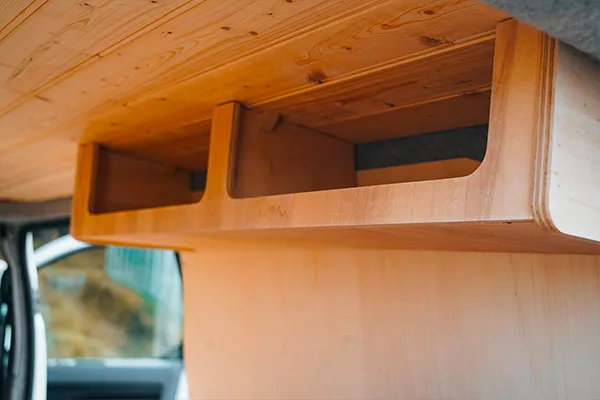
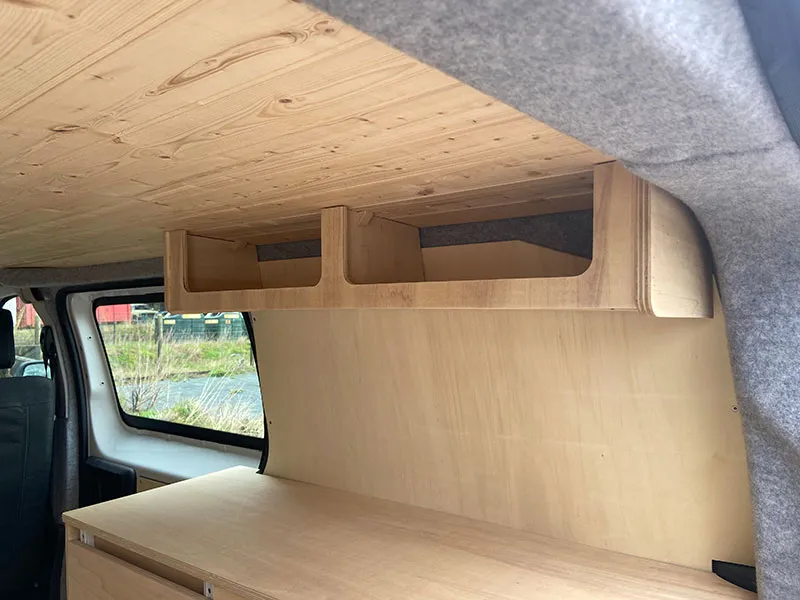
D1 overhead shelf fixed under a tongue-and-groove ceiling

Ceiling

Your choice of ceiling lining can affect your conversion, especially if you want to install our D1 units.

We recommend 5 mm plywood lining, screwed directly to the bodywork or bonded with SIKA adhesive. If bonded, the installation is permanent and cannot easily be removed.

Important: If your vehicle has a pop-top roof, installing overhead units may not be possible. If you still want to install them, make sure the lining has reinforcements strong enough to support them.

Bulkheads

Bulkheads are not standardised and can therefore cause incompatibilities with our kits.

If you want to keep your bulkhead, check your dimensions carefully before ordering. It can limit the available space and prevent the furniture from being installed correctly.

The key point is to check that the floor area actually available can fit all the furniture you plan to install, taking their overall dimensions into account.

Important: On the Expert and Jumpy, the bulkhead must be removed if you choose two units on the left-hand (driver’s) side of the vehicle, e.g. 1 bed + 1 K1, or 1 bed + 1 K5.

Bulkhead behind the front seats of a lined van
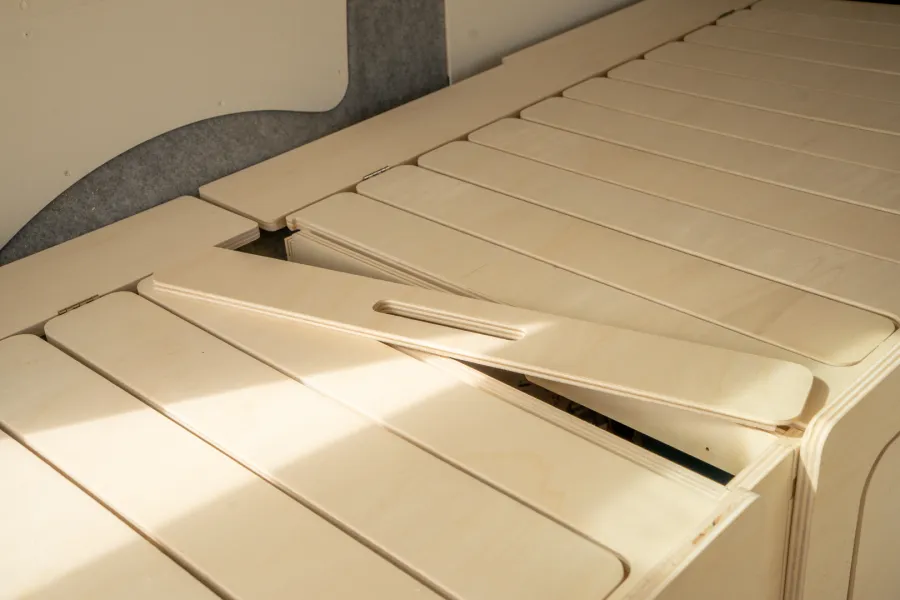
7 cm extension and its handle on a Slide bed

Bed extension and mattress choice

7 cm extensions are supplied with all our beds, but they can’t always be fitted.

Whether you can use them depends on several factors: the kit or combination of furniture chosen, the floor area actually available in your vehicle, whether there is a bulkhead, etc.

Depending on your layout, you may sometimes need to keep the bed at its original size without the extension.

For any individual (à la carte) furniture order, please check your usable floor dimensions carefully before installation to make sure the extension can be added.

Important: For kit orders, a specific layout is recommended. It is important to follow it, as it is also designed around the dimensions of the mattress supplied.

Bed cut-outs

Our beds are designed to be adaptable and fit as many vans as possible. They are not made to measure.

Depending on your vehicle, the furniture chosen and its position, some cuts may still be needed for an optimal fit.

All cut lines are pre-engraved on the underside of your bed base: simply follow the lines for your model (does not apply to the ADAPTABLE range).

Important: Before cutting anything, download the layout guide for your vehicle and kit from our “Tutorials and instructions” section. Following the right recommendations avoids premature cuts that may turn out to be unnecessary.

Bed with extension in an Expert, seen from the rear: strip cut to follow the wall
Strip cut around the centre post of an Expert
Bed strip with its pre-engraved cut line
Van with both sliding side doors open

Dual sliding side doors

Our units and kits can also be installed in vehicles with two sliding side doors.

However, you will need to reinforce the step on the driver’s side and extend the wooden floor up to its top level. This is essential so that the supports of the unit placed there sit flat on a solid, stable base.

Important: Only our beds can be reversed and installed on the passenger side. For any other layout, you will need to extend the floor on the driver’s side.

Wheel arches

Our furniture is designed to fit directly over your vehicle’s bare wheel arches.

Any existing wheel-arch boxes or trims are not compatible with our units and must be removed before installation.

Likewise, wheel arches must be left uninsulated for the furniture to fit properly. You can cover them with felt, provided it is thin enough not to get in the way of the furniture.

Felt-covered wheel arch in a lined van
Edges of poplar plywood panels

Our wood and quality standards

All our furniture is made from poplar plywood and delivered as raw, untreated, unvarnished wood.

This lets you finish your furniture however you like. We do recommend applying at least one coat of protective oil to nourish and protect the wood.

For our showroom furniture we use Rubio Monocoat oil in the “White 5%” shade (“Soupçon de blanc”), which keeps a natural look while slightly lightening the wood.

You can also use varnish, a hard-wearing floor lacquer, paint or any other wood finish depending on the look and level of protection you want.

Tolerances and appearance of the wood

Poplar is a natural material, so some variation in appearance is normal and accepted:

Visible facesKnots are accepted if under 2 cm in diameter, with a maximum of one knot per piece.
Non-visible facesAll knots are accepted, with no restriction.
SpecklingThe wood may show small dots known as “pin knots”. This is a natural, common feature of poplar and is not a defect.
Colour and toneWood is a natural, living material, so shade and appearance vary from piece to piece. Not every piece will be uniformly light or smooth, and the grain may be more or less pronounced depending on how the wood was cut. These natural variations are part of poplar’s character and give each piece of furniture its charm and authenticity.

Section 4

See how it looks

K1 kitchen unit

Our kitchen units are always supplied in the ADAPTABLE version.

They are not cut to match the exact shape of your van’s wall, but are designed to fit as many vehicles as possible.

The small gap that may remain between the unit and the wall, due to the wall’s slope, is naturally hidden once the mattress is in place.

K1 unit behind the front seats of a VW T6, mattress in place
VW T5 / T6
K1 unit behind the front seats of a Trafic, mattress in place
Trafic
K1 unit and its drawers behind the front seats of an Expert
Expert / Jumpy

Optimised ventilation for your cool box

We have maximised the ventilation for your cool box in the K1: the air vent rises above the bed base. This lets your cool box run on less battery power.

The vent is hidden once the mattress is in place, yet the gain in airflow is remarkably effective. This applies to every kit that includes the K1.

K1 unit seen from the bed without mattress: air vent above the bed base
Without mattress: the air vent
K1 unit with the mattress in place, the air vent hidden
With mattress: the vent is hidden

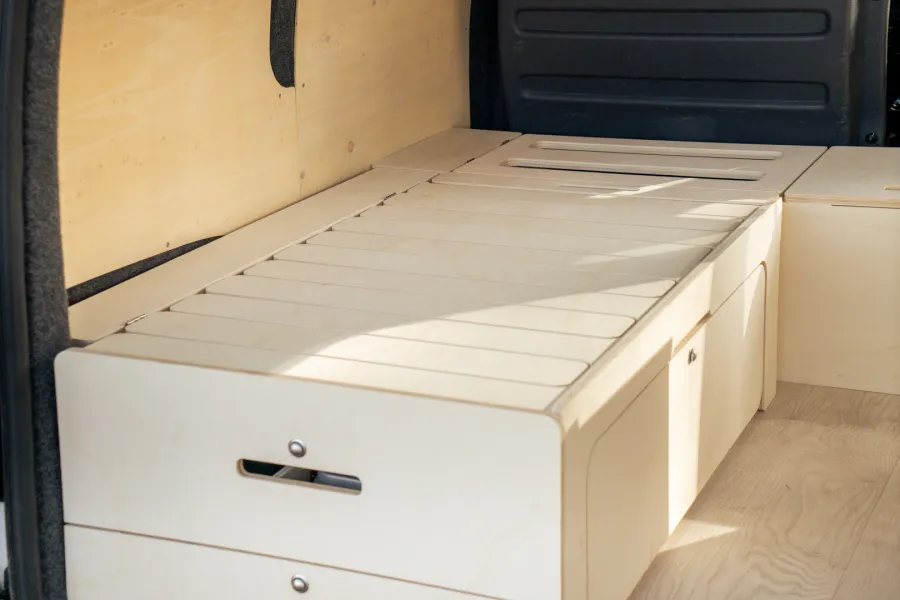
Slide beds

Our beds are designed to be adaptable and fit as many vans as possible. They are not made to measure.

On the VW T5 and T6, which have wider wheel arches, a gap of about 4–5 cm is left between the bed and the side wall, as shown below.

Once the mattress is in place, in either bed or bench configuration, it rests naturally against the wall, so the gap has no effect on use.

Bed without mattress in a VW T6: steel rule across the gap between bed and wall
VW T5 / T6, without mattress

Fitting in the Trafic and Expert/Jumpy

For vehicles using the extension, the strips must be spaced 2 cm apart.

Strips along a bed with extension in a Trafic
Trafic, bed with extension

TINY range

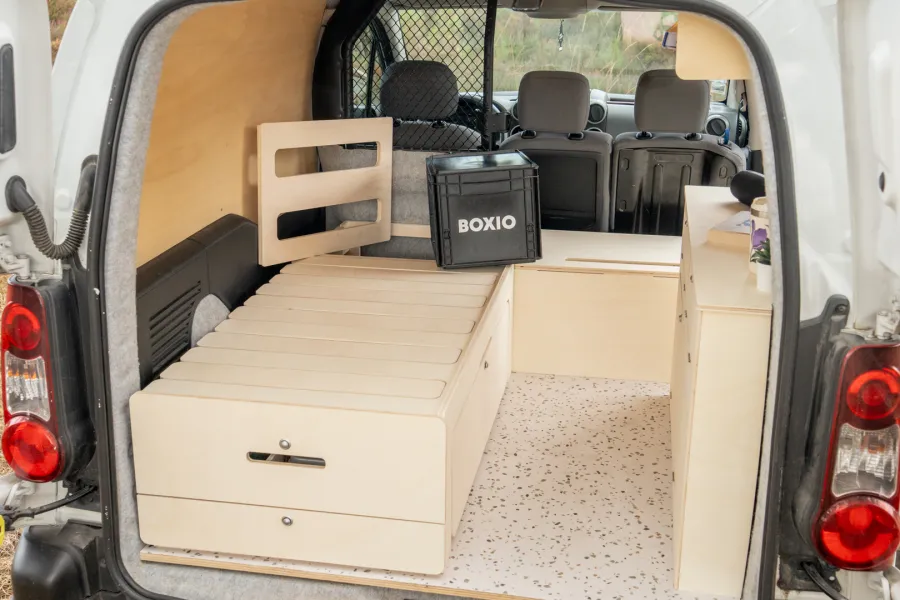
For the TINY range, bed installation varies by vehicle model.

Vehicles with original side plastics (Kangoo, Partner, Berlingo) do not need the strips. On the Caddy, however, the strips must be fitted on the wheel arch for the bed to sit correctly.

TINY bed in a Partner, no strips
Partner: no strips
TINY bed in a Caddy, with strips
Caddy: with strips

Side units

All our side units (A2/A3) are made to fit your van model, provided it has original-type 5 mm wooden interior linings and the floor is at the recommended height.

A2 side unit in a VW T6, seen from the rear
VW T5 / T6
A2 side unit in a Trafic, seen from the rear
Trafic
A2 side unit in an Expert, seen from the rear
Expert / Jumpy

D1 overhead shelf

D1 shelves may need to be trimmed depending on your ceiling (tongue-and-groove or 5 mm plywood).

ADAPTABLE D1 overhead shelf under a tongue-and-groove ceiling
ADAPTABLE version, tongue-and-groove ceiling
D1 overhead shelf at the rear of a VW T5 / T6
VW T5 / T6

Not sure about your setup?

The van selector shows you the right version for your vehicle. For anything else, our team is here to help.

Menu

MENU